Monday, 30 November 2015

Task 1 - Schedule

Complete schedule for the project for all of these task and the supplied template, with this chart it will help me allocate enough time I have till the final deadline. The schedule that I have will need to be reviewed and updated at least once or twice a week.

This is my predicted timetable for this unit and I hope that I could stick to this timetable but it may change over time depending on my type of environment that I need to build and may need even more time to make my assets.


Week 1:

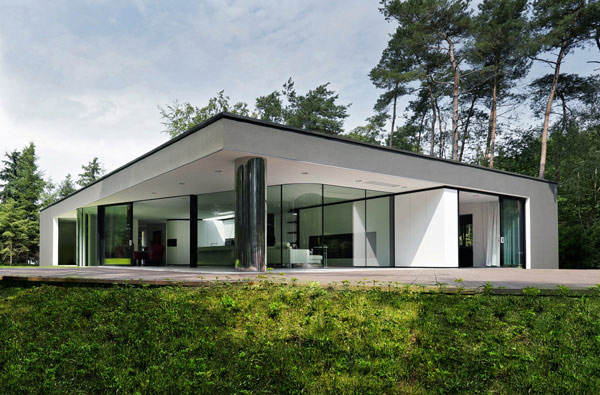
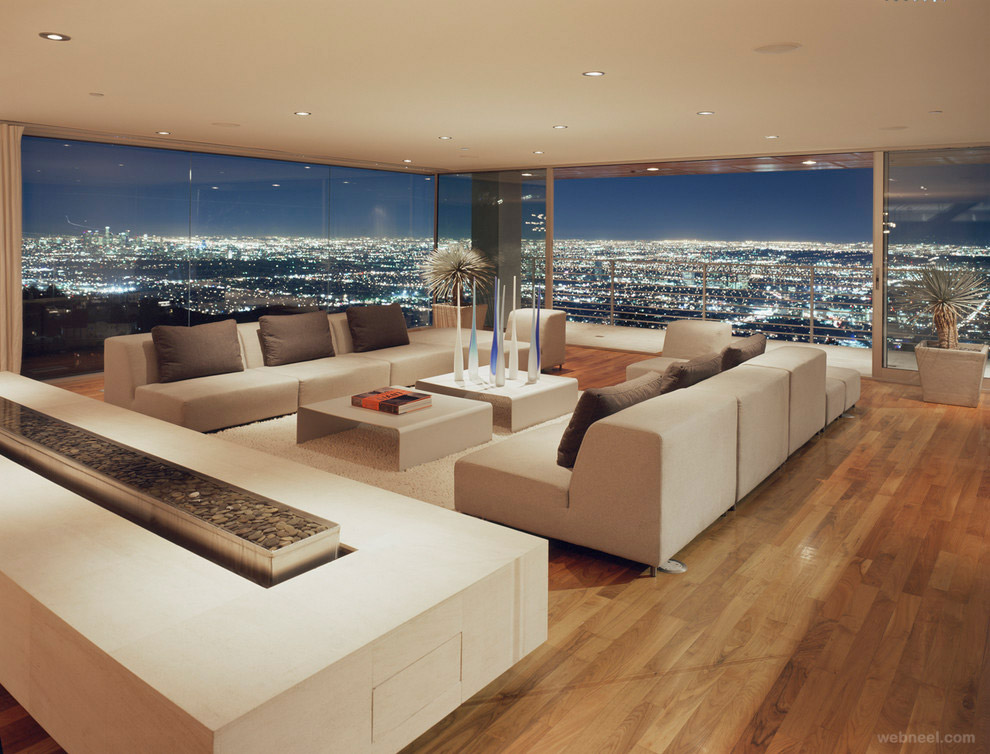
I got off on a quite a good start on making my schedule and started doing researches on what my design might look and what furniture object it will have, I've search on the internet with example images. It gave me ideas to start me off on my 3d environment.


Week 2:

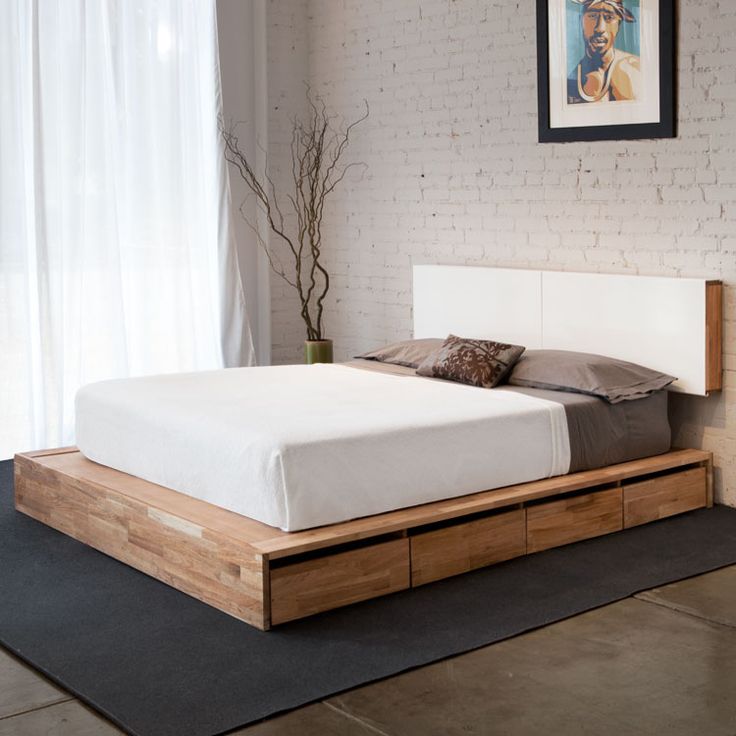
Then on second week I've started look at more images on my design pack and what I am certain to include on my level but made some changes along the way due to it not working out for me, and had some stuff to sort out so my level design would go well, I made some mistakes on the objects like the doors, windows that I am going to have with that not working out quite well I had to make some quick changes straight away.


Week 3:

With the christmas break a few days away I filled in the legal ethical checklist and sign and dated the sheet and posted it on my blog, with that finished I had to think about my lightwave modeler design, I knew I had to carry on working on that and making each furniture's but as christmas break came I didn't get as much work done except only accessing my blog at home.


Week 4 & 5:

On those two weeks I just worked at home on my blog expanding my work on my design pack and added more images on what I think what would go well on my 3d environment and also made some adjustments on what mistakes I've done and what went well for me.


Week 6:

As the christmas break finished I continued on my lightwave modeler work by adding and creating more furniture's that I've done then taking images on what they look like and adding them on my blog on my environment build. 


Week 7:

I am continuing on my environment build which is task 5 on my blog, I am still putting images of the objects I've designed and I will be importing this into modeler and making my assets based on my layout of my fantasy modern house, I've made missed both presentations due to illness, but I want to plan on doing that on the next one and going over what I've done and made mistakes on and improved on.


Week 8:

I am quite behind on my schedule realizing that I don't have that much time, I put a lot of time making assets and blogging them on task 5 on my environment build. I hope that I will complete it soon and have time to complete the task by next week. Then complete my walk through demo, I will be acquiring a lot more time. Hoping everything would be done before the deadline hits.


Week 9:

I am on my final week, I plan on getting my walkthrough completed by the deadline on Friday but unfortunately I did not mange to complete the whole assignment by the deadline but got an extension to add and try to perfect some little stuff to it and hopefully get everything finished with the 10 college days I have on my extension.


Task 2 - Setting Research and Ideas Generation

I had to collect a wider range of visual and written researched and about the one I've chose for he setting and considered a brief and must have been set carefully, present the findings that you have in the blog so it can be easily work from them, this is where you will generate ideas and you'll have yourself essential reference materials to work from. Ensure that you are meeting the requirements of the brief from the start and show all the site sources.

You must consider the timescale and the plan of your project that you are doing accordingly, I will be having a fantasy for my interior setting and inspiration design, I will be researching and finding sources for the material for my selected interior.

With this theme I've picked out I want to give the fantasy a future type vibe so it would be modern and see houses in the future with a light and bright feel to it, I want it to feel like a good environment the house having different access and rooms to it, I want to try and make it stand out with the glass house material.

I've been looking at modern houses and they have this really good and modern vibe like it's shows the house with multiple room.


It's that vibe to show a house is really different from other houses and show what it is like inside in a FPS view perspective and show different rooms around the house and navigate the camera around the room. Modern houses gives that good feeling on how the house could be different to any ordinary house and it makes it stand out to the modern perspective.


These images are examples of houses and has a lot of space and these are just example views from the outer of the house, with the theme I wanted to make it a modern environment and you see the objects furniture's and show all the latest objects a features in the scene

Below there are some more examples of the furniture's that I want to portray:


modern bathroom design photos

I found these images and gave me an idea on how to make a basic modern feel to the house interior that I'm planning to make, it gives me some inspiration on what to do and what it may look like and how it would look like in the end. 

All of the images are shown are based a really good representation of what I want my environment to look like and make it sleek, modern and give that simple not too extravagant and basic style and feel to it, with the use of 3d models such as modern furniture's like chairs, tables, beds etc. I want to give the environment a good standard house like you could imagine living something similar to this.

I also need to think about the objects that I might need to place for my environment, the first example I found was a modern bed which has a basic look to it, I think this would fit good to the environment I'm making:


Also I will try and include some side furniture's with the lamp or vase, plant pot. I think this would add more feel to the modern house that I am creating and wanting to look like:


Modern houses would have some other furniture's like bookshelves, desk, sofa's and many more, all of this would look really good altogether as a final look for the environment:


Task 3 - Design Pack


The first thing I've done for my design pack is create the bird eye view from above and show my floor plan and this is my first draft and will probably change it as I got along but for now I tried making it more simple and easier to make and what it looks like and this gives me ideas about how I want things to look from a standard point of view.

This view it had that simplicity of a birds eye view and added a hallway and five different rooms and all of this will add up to make an environment look good. I had the white lines as doors to label which you can enter the room at. When the actually environment is made this will actually be a regular size modern house and the furniture's that I'm going to have will be decent size to fit perfect for each room itself. Then I was planning to do with the furniture's that I am going to add on is make them in different sizes, so they could be really big and some could be quite small as the size of the furniture isn't accurate.

The environment comes a lot of 3d models and for these to be made I need to have some base imagery that will help me on what it will look like, I will be putting images on what my imagery that will help me with my modelling that I am planning and if it goes well with the birds eye view environment that I made.

Sofas:

For the sofas that I will be using will mostly be corner sofas since it takes up more space in the room, that would make it easier for me on filling up spaces on each rooms.


Beds:

The design for the beds that I might have is going to be simple but yet try to have that modern look for it and probably the size would be quite big to fill the space for bedrooms.


Doors:

The door design that I am planning to have is all mostly single doors on how it's more simple and basic with a modern style to it, after making some changes to me environment design I chose to having a single door on things not going to plan and made some adjustments about that.


Tables:

The table that I might design will be similar sizes as the chairs so that the both furniture will match and have that proportion estimated size. 


Chairs:

Like I said that the chair I will design will be similar sizes and the table to match them and try to fill the room and space in the environment.


Task 4 - Legal and Ethical Checklist


Task 5 - Environment Build

I made a basic small environment that I am building for my fantasy modern house, with it being a simple shape I could do so much things with it on having large, medium, small furniture's on the environment.

In here you can see 4 medium size rooms and 1 small room and a hallway for each access entry to each room, it gives me a good idea on the layout that I've done and what I could do and what my final piece might look like.

I started making each individual piece of my wall in illustrator and added them together on unity just to start of my simple level design, below you'll see that I'm going to start off making individual furniture's for the house that I am doing:


With the non to scale furniture's and objects I've made a window looking regular from the outside of the house and as you look inside of the house there will be some furniture's having large and small sizes as it looks completely different from the outside.

This is one of my simple door that I made for my house, I made single doors instead for my modern house considering double doors would take quite a lot of space in my house and I want most of my furniture's to fill that space. So I made this by simply drilled and beveled some areas and added a door knob on each side then finally extruding some areas like the shape of the door and the door knobs.

For this bed I created a box shape as the furniture is not to scale I made it some of my furniture's quite large by trying to fill the space and some small furniture's to make it a fantasy, I had some details with my bed by having pillows and a bed sheet, I then added more details with the bed by using points to raise the bed sheet a little higher and have that ripple and mess with the bed sheet instead having it as a straight sheet. I subdivided the bed sheet to bend it as well so it would fall from the bed/mattress.

Then in the same room, I've made myself a desk with monitor screens and a desk chair. I got some objects that's quite large like the tower of my computer desk I've made the button for that really huge then with the monitor screen quite wide and huge trying to fill the space, overall I made this by having a lot of subdivides so I can manipulate and control the furniture's a lot more easier, again with this not being not to scale I'm going to having this as a medium size to fill one room of my house.

I made a really small cupboard that is not to scale I used it to fill the space in the smallest room in my house, it is meant to be a room with a regular size cupboard but instead I tried to make it as small as I can I could have gone smaller but the object would be really hard to see. I made this by using a simple box and extruding it and making some areas smooth and finishing off with the handles by extruding it as well and pressed tap to make it more of a less box shape.

I moved on with my kitchen design on a different room then made a cooker I started off with a simple box then added a disc shape for the cooker on the top then added some details in front of the cooker by adding a long rectangular shape and knob switches, I made the size overall quite small compare to my other objects in the kitchen room I made.


For my fridge I made this by using a simple box shape and extruding it to make it longer in height, then made some handles for the fridge with a small rectangular shape. I made the size for my fridge quite big compare to my cooker so you could notice the non scale size difference. 


My oven that I made is a simple box shape again but just beveled the glass window for the oven and added handles using a rectangular shape, with the size on my object that I've made is really big, it's similar to the fridge that I made and compare to the cooker again the size comparison is different.


I've also made the shelves for my kitchen room I made this more of a regular size compare to my cooker, fridge and oven, I made the size between the middle. I also added some handles and small little details for my shelf like the handles and the long bar across the shelves.


I've made myself a shower design for my bathroom and as I go along with it I made it really small as a go along as you view it you would have to focus on it carefully to notice it, with my design I used a simple box texture around it and a bottom box as well for the base of the shower, then added a simple shower at the end with the nozzle and the holder for it by extruding the nozzle and beveling the shower.


Then with my living room at my environment house I've made a mini television as you would see it in a small perspective compare to the furniture's around the room, with a simple box texture and with a little beveling I made my television with a simple design.


Again with my living room design I focused on making more furniture's around that certain room so I decided to make a huge corner sofa that would fill the space and look huge compare to the television around that room, I started off using a simple box texture and as I go along I extruded the boxes across then extruded it again to make an '' L '' shape for the corner sofa, I've added some details by smoothing some edges and sides of the sofa and finished off by making some more box textures and smoothing it out to make the pillows for the sofa.


To finish off my bathroom design I made a completely large object size and a huge comparison size to my shower, I started off using a simple box texture at the bottom to have the base as my toilet then used a cylinder shape to create the main body part for the toilet and extruded the shape to make the lid, then bevelled it to push down and have the detail with it. Then at the back I used another box texture to create the back rest for the toilet whilst at the top to make to a small flush button for the toilet by bevelling the cylinder shape.

List Of Textures Used:


Task 6 - Prototype/Flythrough Build

The Build

In here I've got some images of the build that I got within layout, I've added some textures and setting everything up to see how it looks like and making sure everything in the environment goes to plan as I expected, making sure the house looks non scale measurements of the furniture's but at the same time with a modern feel to the environment that I am building.

This is the living room that I planned and made the sofa of the living really huge as it would fill the whole space then added and small mini television at the side of the wall as you see some of the features is modern yet a weird size of the furniture's

With the bedroom I've made some stuff quite normal yet different, like for the desk and the computer I made the tower of my computer with a huge power button as you can see, then with the monitor really wide and large then a mini chair to top off the desk design, also with my bed I made it normal as well with a typical modern look to it.

With my bathroom this was probably the most craziest design that I've done compared to any other of the rooms, with the huge toilet that I've design I made it really simple, basic and a typical look for the toilet, then compare that with the shower that I've designed as well you can see that the miniature design it would seem ridiculous yet fit in quite well with my design.

This was my design for my kitchen, I've made I created the oven, cooker, fridge and some shelves at the side, I made the size quite different for each one making them larger than the other and making it different and tried to make it modern.

This is the hallway the I made and connects to each room of the house, at the end of the hallway it's got a small room cupboard room with an actual small cupboard as the size is literally small.

The Flythrough

I have completed and finish my flythrough, the flythrough that I've made has 450 keyframes in total which shows off each individual rooms of the house, When I have completed the light and then rendered the whole project, hopefully it would look much more better but for now, I got some screen shots at the bottom to see what the flythrough looks like in each rooms without lighting, which I will be adding later on. 


On top shows the each individual images of the room, camera view and birds eye view of the 3d house environment I got, this is where I made some slight changes and tweaks by smoothing out some surfaces of my objects and hopefully with the flythrough video it would turn out to make a good effect with the lighting and shaded textures and objects, as soon as I rendered and upload the video.